How to plan a Sleepover for Your Friends and OG Dolls!
Pajamas, giggles, and excitement way past bedtime…it’s time for sleepover fun! Whether it’s your first time hosting a slumber party or if you’re already a sleepover party pro, having a sleepover can be one of the best activities ever to share with your friends – and your Our Generation Dolls, too! Follow the 12 Steps for the Perfect Sleepover! guide for kids and parents and learn how to plan a slumber party!
So you’re super excited to host a sleepover with your besties and your dolls – but there are so many steps to plan the perfect party!! Where do you begin?
*Check out the links at the end of this How-To Guide for even more slumber party ideas that you can share with your dolls!*
How to Plan the Perfect Sleepover:
1. It’s All About Numbers!
The first step to planning the perfect slumber party is to figure out how many people you can invite! (After all, your sleepover will be a LOT different depending on whether you have one guest or 10!)
2. The Greatest Guestlist!
Now that you know how many people you plan to invite, it’s time to make a list of all the friends you plan to invite. If you can’t decide, ask yourself these questions:
- Who makes your time together the most fun?
- Which of your friends get along the best?
- Who are your 100%-absolutely-must-invite guests?
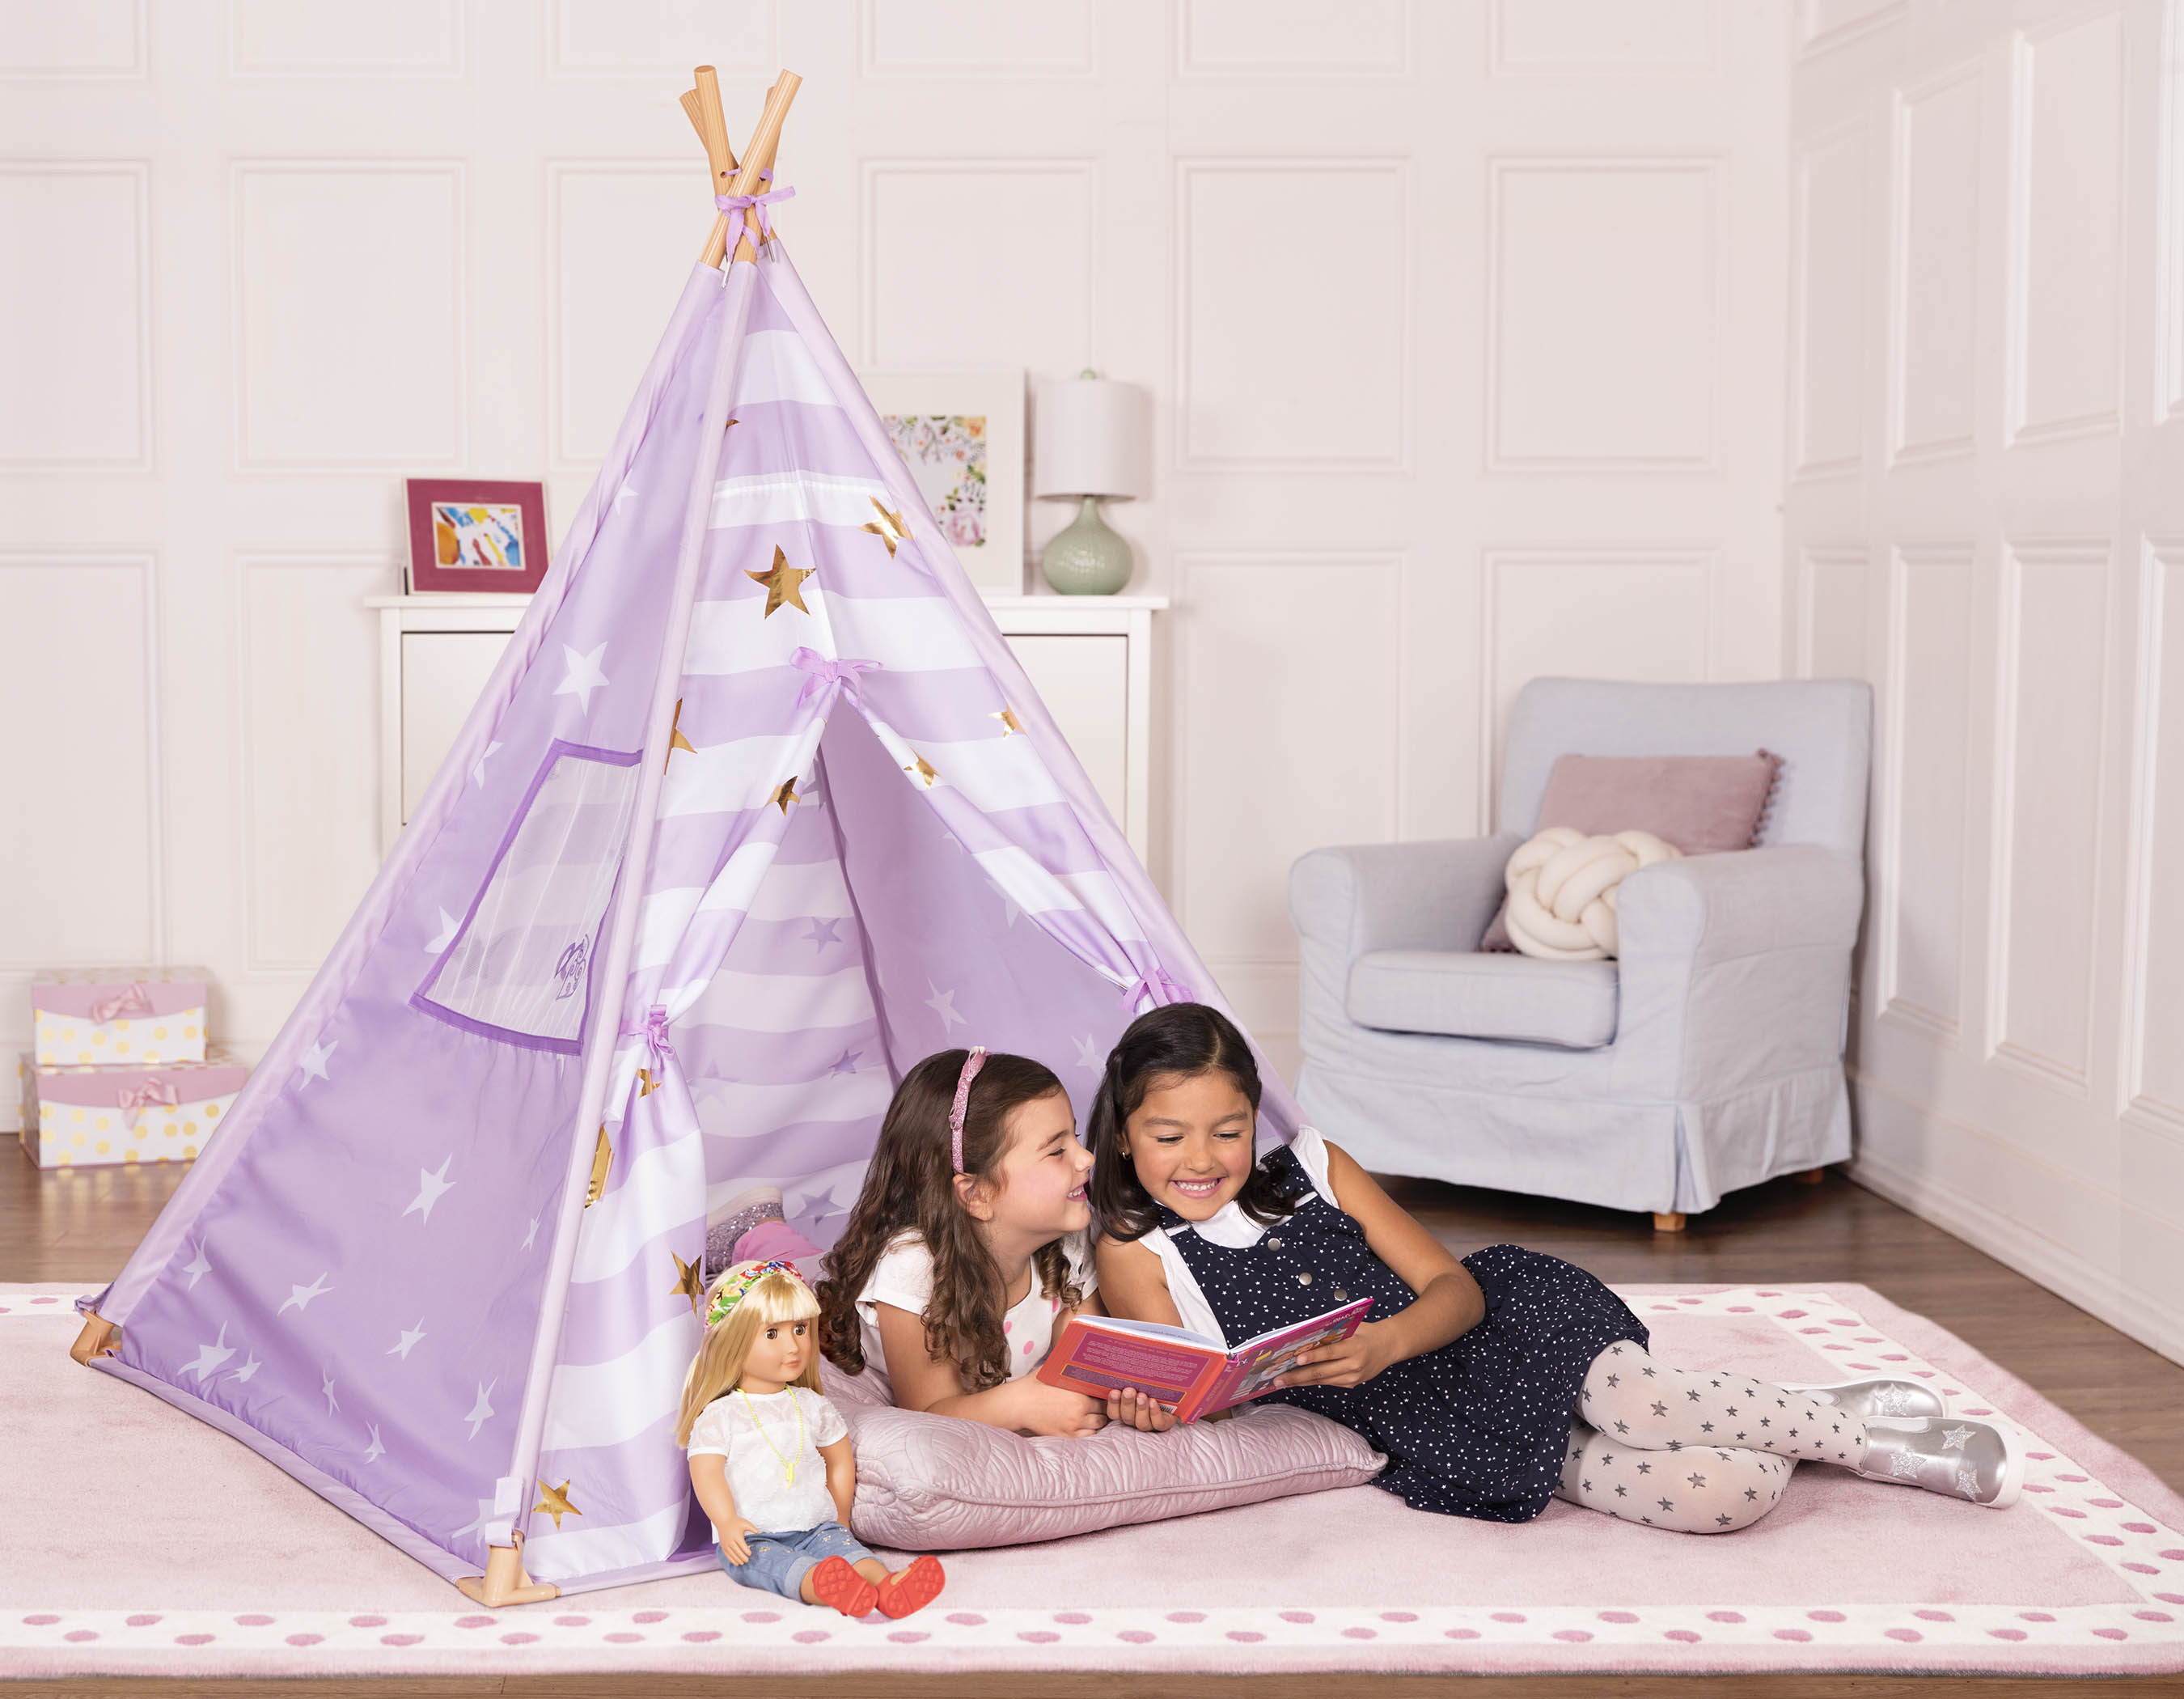
(*If you want to share your sleepover fun with both friends and your OG dolls, you can also think about which of your friends have a doll or a toy that they can bring with them as another way to select your guests. If someone doesn’t have their own doll, do you have one you can share with them?)
Hint: Even numbers are easy numbers! Planning a small group of 2, 4, or 6 people will make sure that no one is left out when you do activities!
3. Timing is Everything – Pick a Party Date!
The date you choose for your sleepover party is pretty important. Are you planning the sleepover for a special occasion? Weekends are usually the best option, but spring break or other holidays can work, too!
Hints:
- Make sure that your guests will be available.
- Is there anything else happening, like a friend’s family vacation, a soccer tournament, or something else that might prevent your guests from attending?
- Does weather matter for your sleepover? If you plan to have your party inside, weather won’t be too important, but if you’re planning to camp out, good weather will be essential
- Plan your sleepover in advance so your guests can add it to their calendar – and have something fun to look forward to
4. Think of a Theme!
When you’re planning a sleepover party, a theme is a great place to begin! Planning the theme of the slumber party will help to inspire you to make it extra fun and special, and having a theme will also make it easier to plan the details. You can use the theme to choose activities, decorations, and even snacks! There are lots of great sleepover party themes to explore, and you can get really creative!
**Here’s a theme ideas that include your OG Doll BFFs: a Pajama Party Fashion Show! Dress in silly mix-and-match pajamas, do your hair and your doll’s hair in matching styles, then have a fashion show where your guests and dolls show off their look! (For some hairstyle ideas, check out these Hair Bow and Boho Braid looks!)
5. Awesome Activities
Sometimes, a perfect sleepover doesn’t need anything but great friends and a cozy place to sleep once you are finished giggling. (If you’re ever finished giggling, that is!)66.
But having a few fun activities can help make your sleepover extra special and also make sure that all of your guests have a great time.
Brainstorm some activities that relate to your sleepover theme:
- If your sleepover has a “Fashion Show” theme, you could make some simple jewelry crafts and have your friends and their OG dolls host a fashion show to share their creations!
- If your theme is “Friendship” you could watch a great movie about friendship and make DIY friendship bracelets with your guests.
The possibilities are endless! Make a list of activities that you would like to do during your sleepover and check it over with your parents to make sure they approve of your ideas.
6. Fabulous Food! 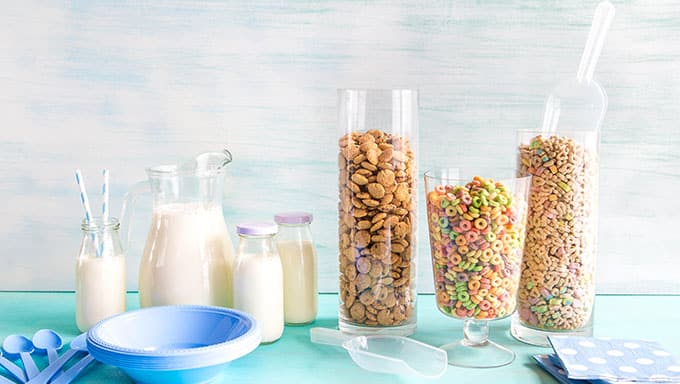
Now it’s time to think about what kind of food you plan to serve to your guests.
- Will you be serving dinner, or just having snacks?
- Easy does it – simpler, easy-to-share foods are a great idea
(**We think pizza makes a great sleepover food – with your favorite toppings, of course!)
- Since your guests will stay the night, what about breakfast?
(**A great idea for breakfast – invite your guests to bring their favorite cereal, and have a Cereal Party in the morning! Everyone can put their favorite cereal on the table and have fun trying out all the different kinds!)
- Does anyone have any allergies or foods that they can’t eat? If you’re not sure, make sure to get this information in Step 9
- Are there any snacks or foods that match your Sleepover Theme? You can have a lot of fun being creative with this!
- What do your guests like to drink? It can be fun to make a party punch or some kind of special drink to serve your guests – ask your parents for help thinking of some great options!
7. A Sensational Schedule
Now that you have a Guestlist, a Date, a Theme, and a list of Awesome Activities and Fabulous Food for your sleepover, you can plan out the schedule for your slumber party!
- What time should your guests arrive?
- If you are planning to serve dinner, have them arrive around supper time. If not, plan for after dinner time.
- How long will your activities take? In what order will they happen?
- We recommend starting with crafts and games, and finishing with quieter activities like watching a movie. (That way, if anyone falls asleep they won’t miss anything!)
- What time will your guests leave the next day?
- It’s important to set an ending time for your sleepover so that your guests know what time to arrange to be picked up. (**Hint: noon is usually a great time for a sleepover to end!)
8. Make a List, and Check It Twice
So you’ve got everything planned out – your pajama party ideas, your Sensational Schedule, and your Fabulous Food. Now it’s time to make two lists:
- List #1: Sleepover Supplies
- Write down all of the preparations you need for your sleepover, including any supplies for food, decorations, games, crafts, movies, and anything else you can think of to be perfectly planned. Share this with your parents so they can help!
- List #2: What Guests Should Bring
- Make a list to tell your guests what they will need to bring. This list can include things like:
- Pajamas and slippers
- An OG doll (dressed for a sleepover, maybe?)
- A sleeping bag and pillow
- A toothbrush
- An outfit for the next day
- Their favorite cereal for a Cereal Party in the morning
- Snacks to share
- Anything else you think your guests will need
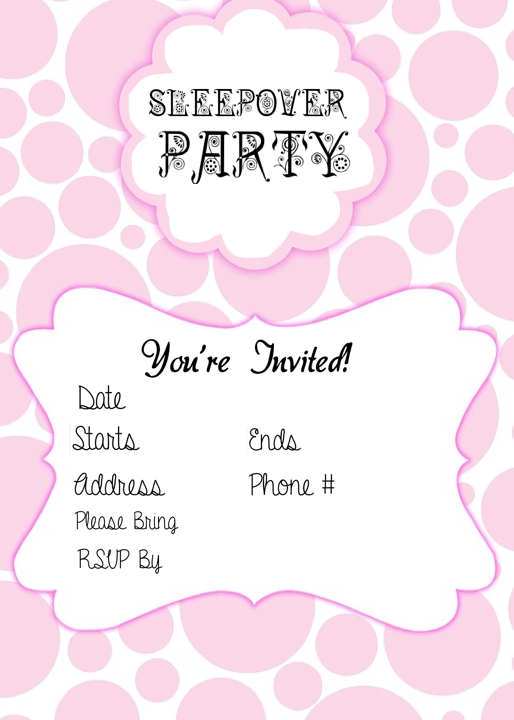 9. Bright Invites!
Wow, you made it allllll the way to Step #9 of the How to Plan the Perfect Sleepover Guide!! You must have everything really well-organized at this point. YAY! The next step is SUPER FUN….it’s time to invite your guests!
When you’re preparing invitations to your sleepover, make sure to include:
- The Sleepover Date
- Arrival time and what time to go home
- Address and phone number (since sometimes parents will want to talk about the sleepover in advance)
- A list of what guests should bring
- A reminder to RSVP by a specific date, and confirm any allergies or risky foods, please!
There are a few fun ways that you can send out invitations:
- Make hand-made invitations and give them to your guests in person
(This can be really fun to do! We love using glitter and stickers to decorate our handmade invitations, but it’s up to you!)
- Send out invitations by email or social media (this option is great because it’s fast, easy, and inexpensive PLUS it’s easy to include lists…and emojis! The only downside? You can’t add glitter…)
10. Party Prep!
Your sleepover is planned, your invitations have been sent, and your guests are confirmed. The sleepover is TOMORROW!! YAY!
Now what? It’s time to prepare! Here are some last-minute sleepover tasks to take care of before the big day:
- Siblings and family:
- Do you have a younger brother or sister who might like to participate in your sleepover? Sometimes this is okay, but sometimes we prefer to have just our friends involved. Talk to your parents and to your sibling to make a plan. Maybe you can let your sibling know that after the party, you will spend some special time together? Think of a solution in advance, so your family knows what works the best for everyone!
- Music
- Make a playlist of great tunes for your sleepover!
- Tidy and Decorate the Space
- Before your sleepover, make sure that your sleepover location is all set for sleeping bags, mattresses, or whatever else you and your guests will need.
- Do you need permission from parents before moving any furniture?
- Are you planning to hang up balloons? Streamers? Any other decorations? Do this in advance, so when your sleepover begins you will be ready and relaxed!
11. Be a Helpful Host!
On the day of your sleepover, once everything is ready and you are waiting for your guests to arrive, you’ll probably be really, Really, REALLY excited!!!
YAY! Your guests will be, too! Make sure to be kind and nice to all of your sleepover guests, and to remember that sometimes it can be scary to sleep away from your own bed. Be helpful to your sleepover guests and make sure that they know you can help them if they need anything. After all, that’s what friendship is all about!
12. The Final Step….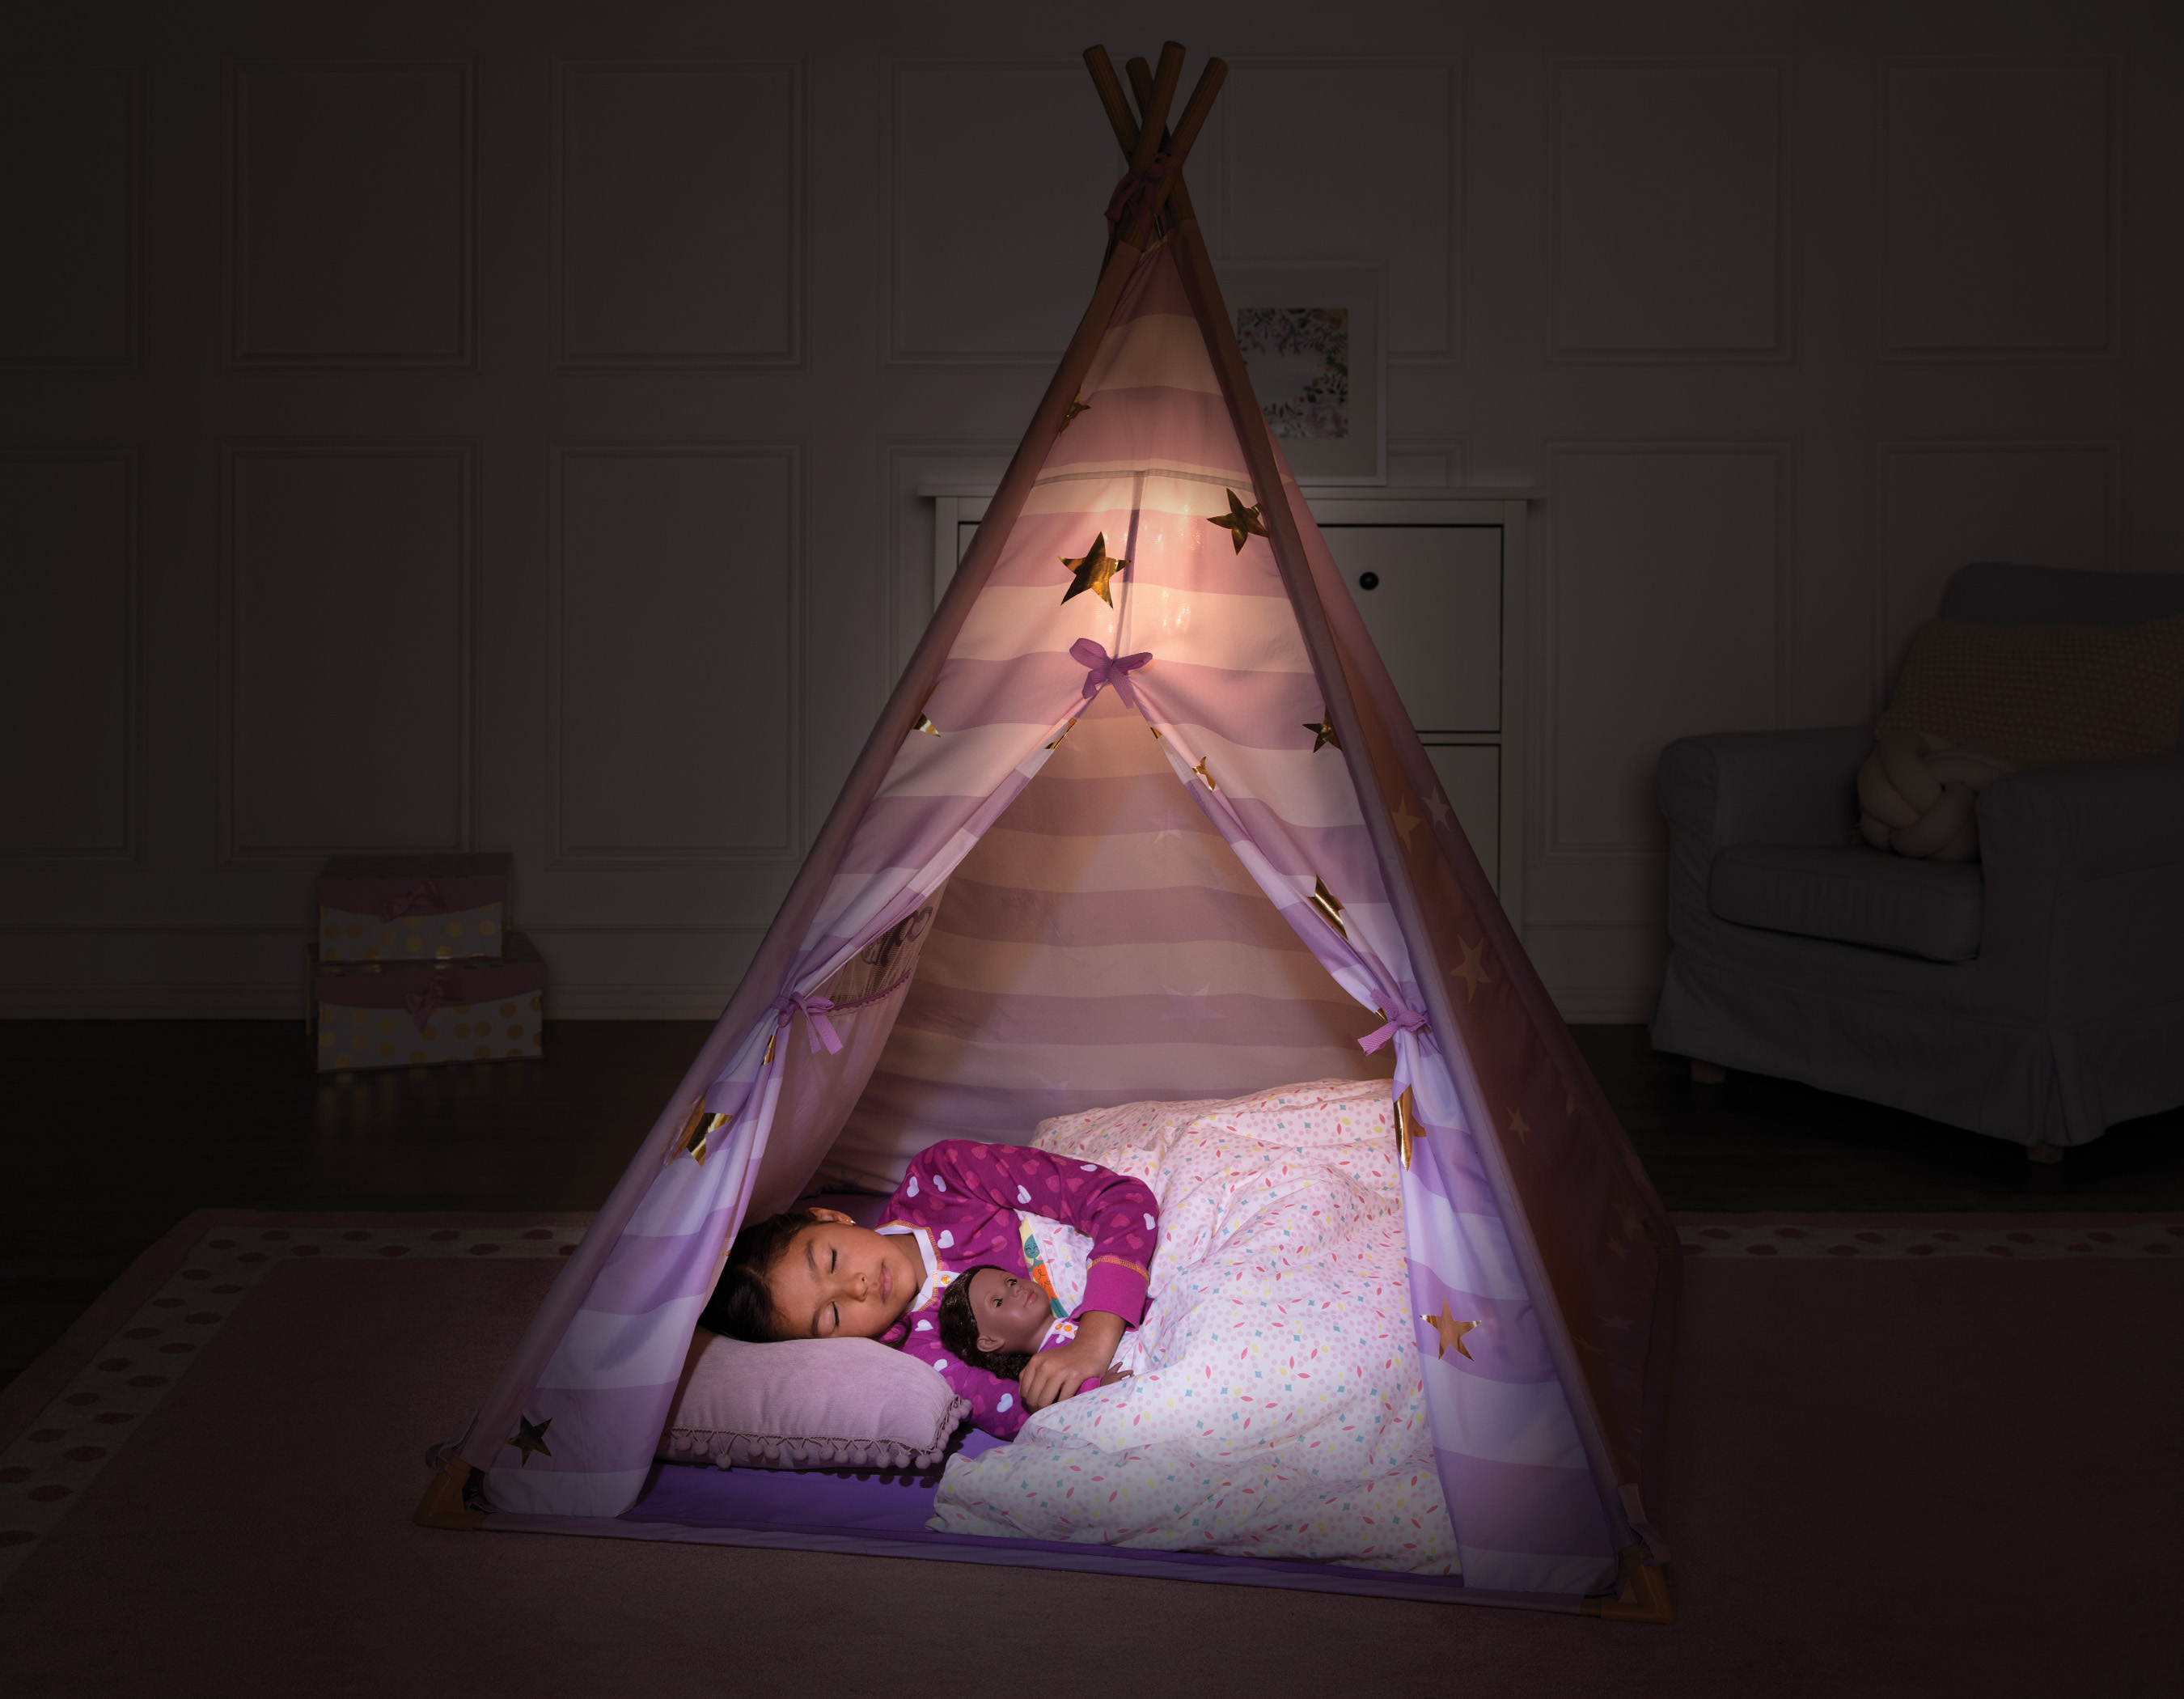
…is to have as much fun as you possibly can!!
By following this guide, we hope you have fun planning and hosting the most fantabulous, perfect, extra-special sleepover in the history of all sleepovers!!
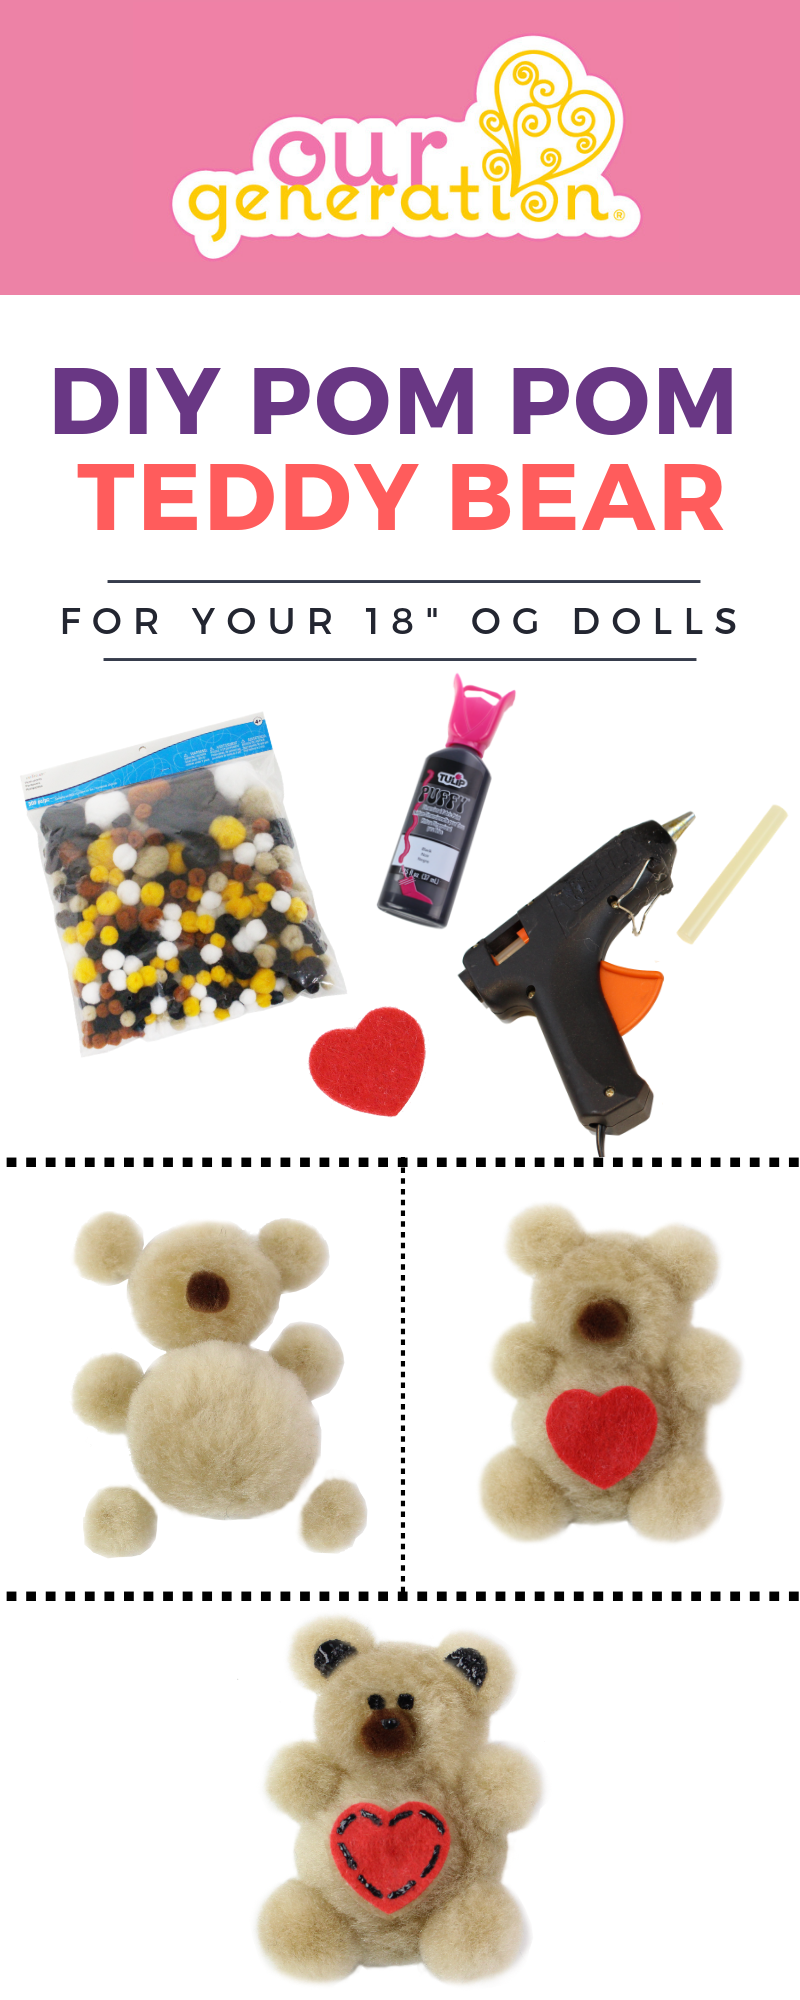
For even more sleepover fun, check out our Guide to Our Generation sleepover toys, explore our New! Sleepover Theme, and experiment making DIY Pom Pom Teddy Bears! What other great sleepover ideas do you have?