Hello From 2021!

Our OG Crafters Kimmy and Suzee are working on a time capsule project for school, and this activity requires lots of imagination, fun, and excitement because after they complete their capsules, they’re going to find it in the future and enjoy a sweet trip back to the past!

Never heard of a time capsule? A time capsule is a jar, box, or container that stores items like photos, letters, or other objects that you love. Then, it’s hidden away for your future self to find at a later date. And when you open it, you’ll be able to see if some of your favorite items and passions have changed or stayed the same along the way!

Follow along with Kimmy and Suzee to create your own time capsule with our activity sheet and step-by-step guide below. Then use their ideas to gain extra inspiration on what to put inside!


Art Supplies Needed:


  • An empty container: shoebox, jar, plastic bin, or other storage capsule
  • Scissors
  • Glue or tape
  • Sheets of paper or construction paper
  • Paint, stickers, markers… anything you want to use to decorate!


*Safety first: this DIY craft requires scissors to cut out the paper. Please get help from an adult to make sure you complete this activity safely.


Let’s Choose Containers

First things first. You need to determine which container you’ll be using to hold your items. For Kimmy, she’s decided to add physical items to her time capsule, so she’ll be using a shoebox to keep everything tidy.

Suzee has chosen to go with a Mason jar, since she’ll be writing down her memories, goals, and favorite items on slips of paper to read in the future. 

Other storage containers work great for this activity too, like a plastic bin to store larger items, a wooden/metal box if you’re thinking of burying your capsule outdoors, or other canning jars for easier storage.


Decorate Your Time Capsule!

Gather your art supplies and start beautifying your container. Each art supply works well with any type of container above, so you can be as creative as you like — there are no limits to your imagination! 

Kimmy and Suzee are starting with titles to put on their containers:


Steps

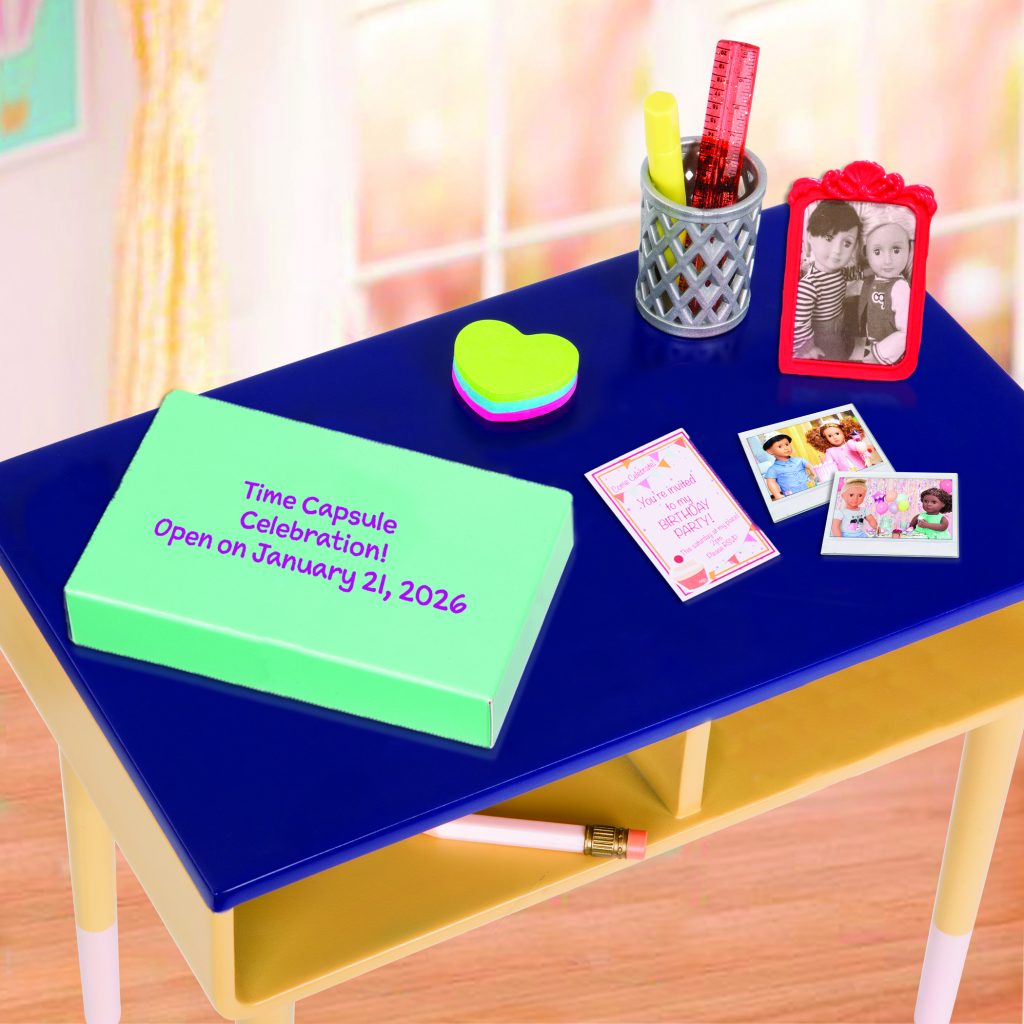
  1. Cut out a piece of paper or construction paper (with adult supervision) to label your time capsule. Kimmy is writing “Time Capsule Celebration!” directly on her shoebox. 

  2. Next, use the glue/tape to stick the label in the center. Suzee’s jar will read: “Suzee’s Time Capsule!”

  3. Optional: Add stickers and draw fun designs with paint and colored markers to decorate your containers even more!

  4. When you’ve finished decorating, pick a date to open your time capsule (it should be far away in the future). Kimmy and Suzee are choosing to open theirs together in exactly 5 years from now! Which special day will you pick?


Into the Time Capsule!

Now is the fun part! It’s time to choose which items will go into your containers. Here are a few ideas that you can use as inspiration:

For her celebration theme, Kimmy is collecting:

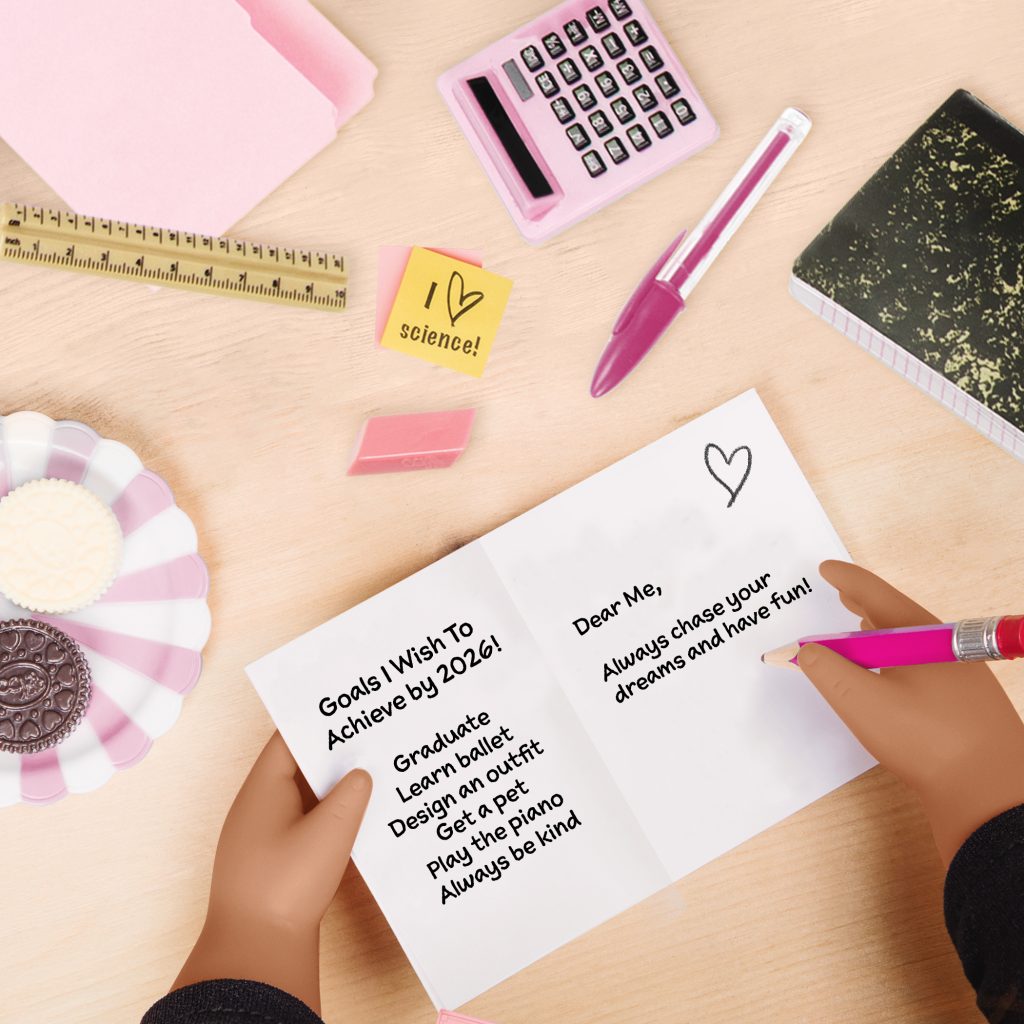
  • photos and cards from her past birthdays
  • a keepsake from her first sporting event
  • her favorite book
  • homemade art projects

Suzee is making a more personalized jar, and she’s including:

  • a written note to her future self
  • what she loves the most about herself
  • a list of goals that she wants to achieve by the time she opens her jar
  • her favorites list of movies, music, hobbies, and school subjects


The Perfect Hiding Spot

Keep your time capsule safe by hiding it in the perfect place. It can be somewhere in your room, up in the attic, tucked away in the garage, or anywhere inside your house. You can also get help from your parents to find a great spot where no one else will find it. 

Kimmy is going to put her time capsule in the back of her bedroom closet, while Suzee will hide it inside the top drawer of her dresser. Neat!

*Fun Tip: Keep a reminder of where your time capsule is hiding by creating a map to mark the spot!

Once the time has passed and the big day arrives, you’ll open up your time capsule and be transported back to the past! You’ll remember all the great memories, dreams, and passions you had when you were younger – how exciting!

DIY Gratitude Jar Activity

Learn how to make your own Gratitude Jar by decorating it with your favorite colors and collecting all your happy moments!

Each day, try to think of something that made you smile, a friend or family member’s name, or special items that you have and write them all down on slips of paper to place inside the jar. You can also draw pictures to practice your artistic skills!

Come back to your jar when you need a little inspiration, or take a trip back in time by reading all the wonderful things that you were grateful for in the past!

Gather the supplies below and follow our easy 3-step guide to get started:

GRATITUDE JAR DECORATING SUPPLIES

  • An empty jar or container
  • Slips of paper and/or label
  • Colored markers
  • Scissors
  • Optional: paint, stickers, or ribbons

*Safety first: this DIY craft requires scissors to cut out the paper. Please get help from an adult to make sure you complete this activity safely.


STEPS

  1. Choose a color and decorate your jar with fun designs, stickers, and other supplies. Optional: You can also paint your jars in your favorite colors to make it extra bright and personal!
  2. Next, use a slip of paper to create a label and add a title with the colored markers. We’re thinking of Gratitude Jar or Happy Moments!
  3. Lastly, make a list of everything you’re grateful for on separate slips of paper and start filling up your jar. You can also use the OG Gratitude ABCs Worksheet for inspiration!

Water Refraction Halloween Activity

It’s a water refraction experiment!

Trick and treat your friends and family to an easy, quick, and frightfully fun activity during your festive celebrations.

Draw your favorite characters, shapes, and other creative objects and watch the image disappear when you mix science with a little Halloween magic! You’ll also learn how this activity works and what’s really happening to your image after you dip it into the water.

Gather up the supplies and follow our 5-step guide below to get started:

SUPPLIES

  • Sealable plastic bag (similar to Ziploc)
  • OG Halloween Card or a blank drawing sheet
  • Permanent marker
  • Large bowl
  • Optional: scissors

*Safety first: this experiment might require scissors to cut the drawing paper. Please get help from an adult to make sure you complete this trick safely.

WATER REFRACTION ACTIVITY VIDEO


STEPS

  1. Print out our OG Halloween Card or draw an image on your sheet of paper.
  2. Next, place the image inside the sealable bag and close it tightly. You might need to cut the paper with a pair of scissors to fit it inside the bag. Please get help from an adult for added safety.
  3. Using a permanent marker, carefully trace over the lines of the image.
  4. Fill up your bowl with water and slowly dip your drawing into the water. (Tip: make sure it’s perfectly vertical)
  5. Look at the image from an angle (from the top down) and watch as the paper in the bag disappears!


OPTIONAL

Get extra creative by drawing other Halloween-themed characters and images for more festive fun!


HOW IS THIS HAPPENING?

The answer is LIGHT! Because light helps us see the objects around us… But how?

Light travels through the air, bounces off an object, and then enters our eyes to show us what we’re looking at. So when you’re looking at your drawing paper before putting it in the water, light is traveling through the air, bouncing off of the paper, and entering your eyes all at the same time. That’s why you can see the paper and your amazing drawing. Neat!

But, if you place the paper in the bag and dip it in the water, the light has to travel through the air AND the water before entering your eyes.


NOW THE INTERESTING PART!

If you look at the image at eye level, the light is traveling straight into your eyes after it bounces off the image. That’s why you can see the paper inside the bag under the water from a straight level. But when you start to look at the image from a higher angle, the light begins to bend a little bit once it exits the water instead of traveling in a straight line. This is called refraction.

And the higher you go (looking from the top down), the light begins to bend more and more until it can’t exit the water anymore. It bends so much that it stays underneath the water’s surface and can’t enter your eyes (this is called total internal reflection). And if the light can’t enter your eyes after bouncing off an object, then you can’t see that object. Even if it’s really there. Woah!

This is why you can’t see the paper in the bag when you’re looking at a higher angle. The light that bounces off the paper cannot exit the water and enter your eyes. Which makes it look like it has disappeared. But, the light that bounces off the bag is not completely under the water (yet), so you can still see the outline!

Spider Sandwiches Halloween Recipe


It’s Halloween season in the OG Neighborhood, and our friends are taking their festive preparations into the kitchen to build their own delicious spider sandwiches!

Join in the fun and follow our easy recipe below to create a dishful of these creepy-crawly creatures and celebrate in spooky style. You can also create more delicious spider sandwiches with other fun, healthy ingredients and serve an extra special treat to your friends and family members! Let’s get started:

SPIDER SANDWICHES – INGREDIENTS

  • 2 slices of bread
  • 1 tbsp of jam
  • 1 tbsp of nut or seed butter
  • 8 pretzel sticks
  • 2 chocolate chips

*Safety first: this cooking activity requires a knife to cut the bread slices. Please get help from an adult to make sure you complete this treat safely.


STEPS

  1. With adult supervision, use a knife to carefully cut a circle out of each slice of bread. (Trick: Place a cup on top of the bread slices to help cut out a perfect circle)
  2. Next, spread the jam on one side of the first circle slice.
  3. Spread the nut or seed butter on one side of the second circle slice.
  4. Stick both circles together to create the body of the spider.
  5. Insert 4 pretzel sticks on each side to make the legs.
  6. Place 2 chocolate chips on top of the bread to create the eyes.
Enjoy your creepy-crawly creatures and have a Happy Halloween!

Let’s Go Pumpkin Painting!

This year, our OG Crafters are getting ready for Halloween with a homemade pumpkin painting activity! It’s a fun twist on pumpkin carving traditions, and it will show everyone in the neighborhood how much you HEART the “spooky” season. All you need are a couple of art supplies and you’re ready to create your pumpkin.

Follow our 5-step guide to add a colorful, unique decoration to your home just in time to trick or treat!

SUPPLIES

  • Pumpkin
  • OG Heart Stencil
  • Marker
  • Tape
  • Scissors or Crafting Knife (with adult supervision)
  • Paint
  • Paintbrush

*Safety first: this colorful craft requires scissors and paint. Please get help from an adult to make sure you complete this craft safely.


STEPS

  1. Print out our OG Heart Stencil here.
  2. With adult supervision, carefully cut out the heart (both inside and outside) with a pair of scissors or a crafting knife.
  3. Next, tape the heart to the pumpkin and use a marker to create an outline.
  4. Choose your favorite color and paint inside the lines of the heart.
  5. (Optional) Choose more colors to add to your heart, and write fun messages for extra pop!
Show us your colorful pumpkin creations on social media by tagging @ogdolls. Happy Halloween!

Falling Into Friendship


Things have not been easy for Martha since she got her cast. She has to take a break from all her favorite activities like soccer, volleyball, and dance lessons at school. She can’t even play in the Hockey Championship Game with her teammates.

But after she chose to stay home instead of attending Maria’s slumber party, her classmate Karissa decided to write her a letter in the hopes of cheering her up…


Hi Martha!

          I was really sad to hear that you weren’t going to Maria’s slumber party tonight; even though I understood that it was because of your injury. I never had an injury like yours before, but I know it’s not easy having to walk with crutches. Someone in my family told me that your arms can get really sore from having to carry your whole body around all day. You must be really strong after doing it for two weeks!

          All of us at school had lots of fun signing your cast. We hope that every time you read our messages you’ll feel much better. And know that we can’t wait until we get to see your cool dance moves again during our lessons. We also wanted to let you know that we’d be happy to continue helping you carry your books at school, move around the cafeteria, or anything else you might need an extra hand with. It can be hard asking others for help sometimes, but we all love being there in your time of need. Always!

          I know you were really excited to play in the Hockey Championships with your team, and because you can’t do the things that you used to do, you might feel left out or alone. It also becomes easier to feel sad and upset about the things you can’t control so you remove yourself from everything you like. But there is a bright side to everything that happens. It’s true! That’s just the way it works. Even in our most unfair situations there will always be a positive. Your last two weeks and your next two weeks might not be what you were expecting, or were hoping for, or maybe even prepared for. But sometimes, what can happen in those next moments might just be the things you need to get through it.

          So, I had an idea that I’m really happy to finally share with you. Instead of us gathering at Maria’s house for her slumber party, we all agreed that we would have much more fun if you were with us. We checked with your parents, our parents, and Maria, and we’re all on our way to your house to celebrate together. Surprise!

          I hope we can all bring many smiles to your face again.

See you soon,

Your Friend, Karissa <3


Definitions


There are lots of words that can help put a smile on someone’s face — especially when they aren’t feeling so great. Here are some bright words Karissa used in her letter to cheer up Martha:


Strong having strength or great power in the mind or body

Bright side the good part of something that is bad

Gathering when people get together as a group

Celebrate doing something special

Surprise something unexpected

Awesome Academy: All in the Family!


Welcome to another day at Awesome Academy! Today, we’re going to explore family heritage with fun questions that will help you learn more about your family members and why it’s important to discover your background.

By asking different questions, you’ll discover how much the world has changed, hear interesting stories that your mom, dad, or grandparents have experienced, and feel much closer to everyone around you.

Before we begin, let’s take a look at what we’re talking about when we say family heritage.


What Does Family Heritage Mean?

Family heritage is the background that you and your family come from. And it’s not just your parents or grandparents, but your great-great-great grandparents (who are known as your ancestors) too. They can all be from different countries and have different nationalities, like Australian, Egyptian, Norwegian, and many others.

When learning about your heritage, you can tell you which parts of the world your ancestors lived in, if they celebrated different holidays or traditions, and it can help you discover new information about yourself that you didn’t already know.


How Can I Learn About My Family History?

One of the best ways to understand more about your history is to ask your family members the right questions, which can lead to new knowledge, valuable lessons, and even playful activities.

Our friend Avia learned that her ancestors were from Sofia, Bulgaria. And she even tried a traditional snack called Lyutenitsa that she made with her grandmother. It’s a mix of tomatoes and peppers that can be spread on toast or crackers and was a very popular food choice with children!

To help you get started, we prepared a printable worksheet of questions along with other fun options from the categories below. The best part about these questions is that you can ask them anywhere: at the dinner table, family gatherings, or even on a picnic.

Family Questions

1. Where did you grow up?

2. Did you share a room with your siblings?

3. What is the most important lesson your parents taught you?


Generational Questions

1. Tell me about some of your favorite songs (can also be books, movies, and television shows).

2. Do you remember any trends from your youth? Popular hairstyles? Clothes?

3. How is the world different today than it was when you were younger?


School Questions

1. Did you have a lot of homework when you were younger?

2. Did you wear a uniform?

3. What school activities or sports did you participate in?


Career Questions

1. How did you choose your career?

2. What did you do with your first paycheck?

3. If you could have had any other job, what would it have been?


Hobbies Questions

1. What was your favorite toy and why?

2. What was your favorite thing to do for fun?

3. What is one activity that you always had trouble doing?


Personal Questions

1. What world events had the most impact on you when you were a child?

2. What’s your recipe for creativity?

3. What are you most proud of in your life?


Every activity deserves a round of entertainment! We added a few silly questions to help you and your family explore fun possibilities. And we think some of their answers might surprise you.


Silly Questions

1. If you could have one free hour in the day, what would you do with it?

2. If you could choose any super power, what would it be and why?

3. Would you rather be able to breathe under water or fly?

4. Would you choose to go to the past and meet your ancestors or travel to the future to meet your great-great grandchildren?


There goes the bell! We hope you enjoyed today’s lesson, and that you’ve learned a lot more about family heritage. We’ll be back with more fun learning at Awesome Academy very soon!